
I have finished my website!
What now?Here’s a short overview of what you will want to check before opening up your booking using your Bookme.ink website.
1 – Ensure that you’ve filled out all of the pages
In order for all of the links to work on your website, you’ll want to be sure that they are all created.
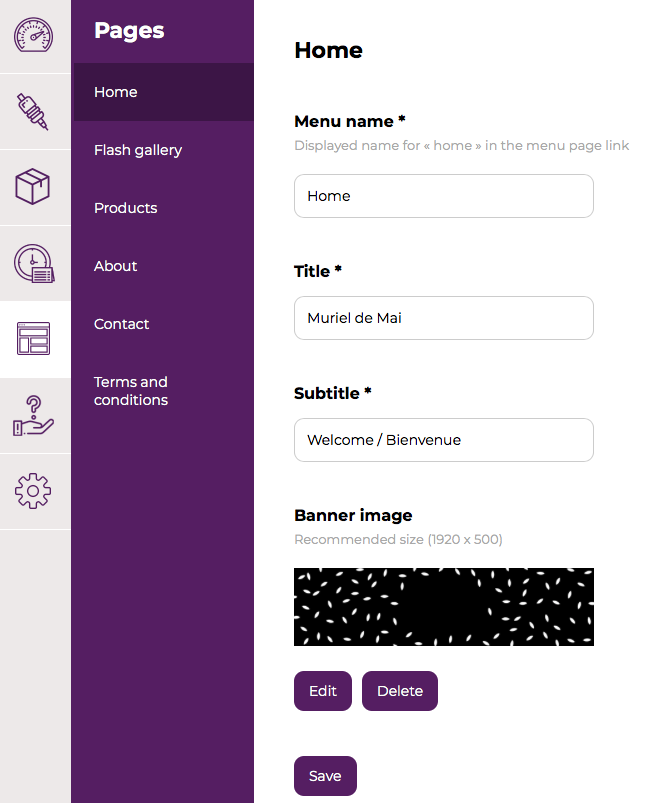
If you’re not quite sure what to write in certain fields, feel free to copy/paste or refer to our example site: app.bookme.ink/yourwebsite
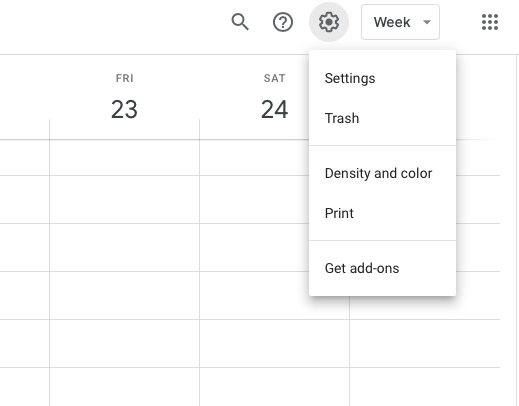
2 – Make sure your time zone is set properly
In order for appointments to be placed at the correct time slots in your calendar, make sure that your time zone is set properly in your Google calendar.
Go to : https://calendar.google.com/calendar/r/settings (you’re unable to adjust this specific setting from your Bookme.ink settings, you’ll have to change this directly in your Google calendar)
Go to the wheel in the top right-hand corner and select “Settings”:
You can then select “Ask to update my primary time zone to current location” as seen in this image:

or you can indicate your desired time zone like this:
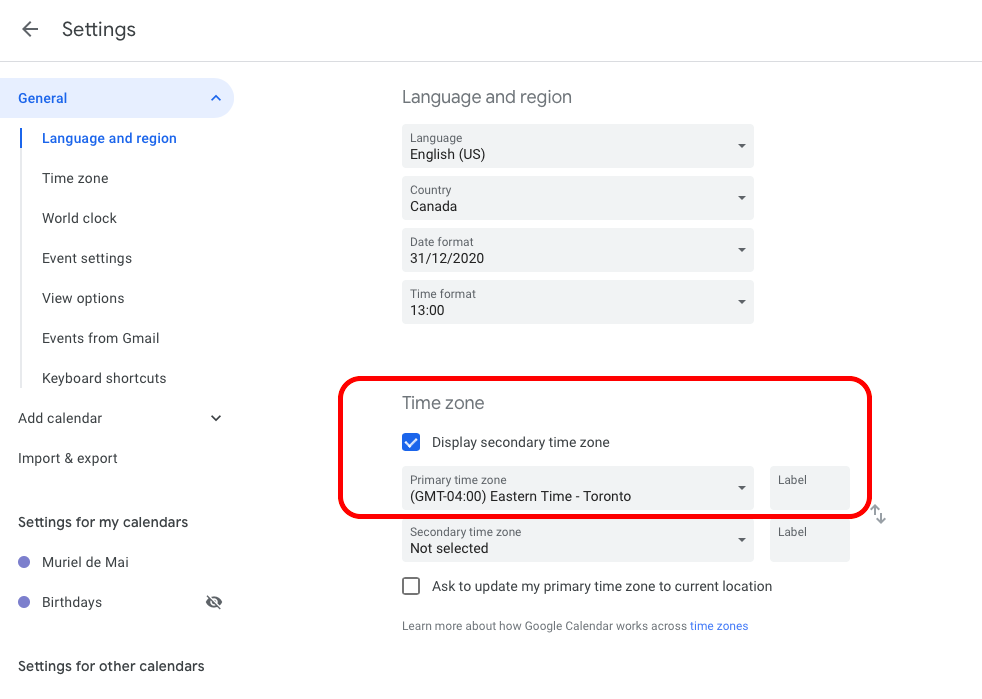
CAUTION: Appointments made while your calendar is set to the wrong or different time zone will not automatically adjust to any new time zone settings. You will have to manually move these appointments to the proper time slot after having made any time zone related adjustments.
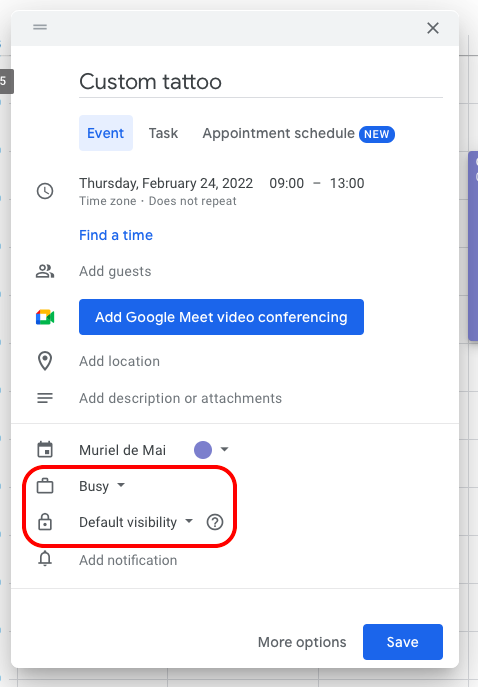
3 – Ensure that the appointments already noted in your Google calendar are set to “busy” and visibility to “default” .
4 – Test the booking!
Book yourself a flash to verify that everything is in good order and it will also allow you to see exactly what your clients see when booking with you through your Bookme.ink website!
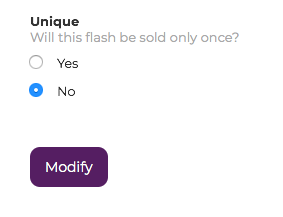
Prior to booking a flash on your website, go to the admin panel of your website and select the flash you’re looking to book as a test. At the bottom, you will see “ Unique: Will this flash only be sold once?” be sure to check “no” to keep the flash in your gallery.
If the appointment is placed in the corresponding time slot in your calendar, it’s all good !
5 – Ensure that everything is set up in your Stripe account and refund the deposit to yourself.
Connect to your Stripe account : www.stripe.com
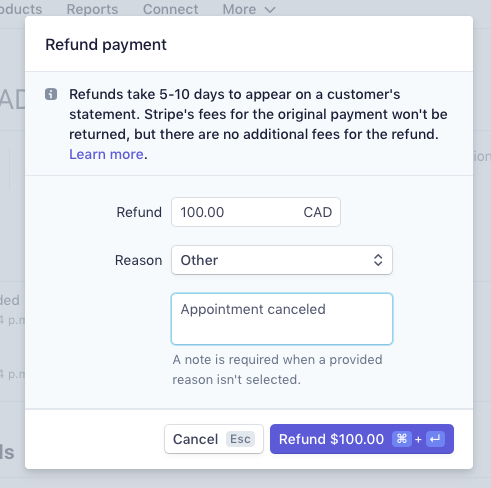
Go to the “payments” section where you will find a line item with the deposit amount (+platform fees), and the description of the flash with a small label titled “success”.
You can then issue your refund, click on the description and then “refund”.

In the pop up window indicate the amount of the deposit without the platform fees, select the reason “other” and then enter in the reason for your refund:
6 – Share your Bookme.ink link!
Congratulations, it’s time to share on all of your socials that you’re now taking bookings on your Bookme.ink website and enjoy all of your newfound free time!